This chapter will describe all features available in
Rentavault and outline how you can use the features of Rentavault to meet various backup needs.
After you have successfully installed Rentavault
to your computer, a Rentavault icon will be added to the system tray area (next
to your system clock) automatically.
This icon is the entry point to Rentavault. Right clicking the icon will show a menu that provides the following functions:
|
Menu Item
|
What it does
|
|
Open
|
Run Rentavault
|
|
Backup
|
Run the backup set (or all backup sets) chosen in the sub-menu in background
|
|
Backup and Logoff
|
Run the backup set (or all backup sets) chosen in the sub-menu in background and logoff from Windows
|
|
Backup and Restart
|
Run the backup set (or all backup sets) chosen in the sub-menu in background and restart Windows
|
|
Backup and Shutdown
|
Run the backup set (or all backup sets) chosen in the sub-menu in background and shutdown this computer
|
|
Help
|
Show a help dialog
|
|
Stop running backup
|
Interrupt the running backup set (or all backup sets) chosen in the sub-menu
|
|
Exit
|
Close this system tray launcher application
|
Before you can use Rentavault, you have to
be authenticated by the Rentavault network first. The logon dialog shown below
will check if you have the right to access Rentavault by submitting the username
and password you provided to the backup server.
For secure communication between Rentavault
and yourself, you can choose to communicate with
Rentavault in SSL (Secure Socket Layer) by selecting the [https] option.
The [Address] field shows the IP address or
server name to which
Rentavault will connect to authenticate your username and password. You can use either a resolvable host name (e.g.
md1.Rentavault.com) or an IP address (e.g. 192.168.1.1).
If
the Address is not accepting connection from the standard ports (Port 80 and 443 for http and https respectively), you can append a semi-colon “:” and your custom port number to the host name of the [Address] field (e.g.
md1.Rentavault.com:8080) to connect to the server using the custom port number (port 8080 in this case).
If you need to connect to the server through proxy, just enter your proxy setting in the [Proxy Setting] section. For [SOCKS] proxy, both v4 and v5 without user authentication are supported.
You can switch the language of the Rentavault user interface by choosing the desired language available from the [Language] drop down list. The languages available include English, Czech, Danish, German, Spanish, Icelandic, Dutch, Swedish, Traditional Chinese and Simplified Chinese.
After the backup server authenticates you
successfully, the Rentavault main window appears. You can then use Rentavault
to update your user profile.
You can perform the following update to your user profile.
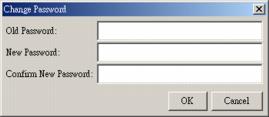
To change your [Password], press the [Change] button next to the password field. A Change Password dialog will appear. Enter your original password and new password into the text field of this dialog and press [OK].

To change your [Display Name], press the [Change] button next to the display name field. A Change Display Name dialog will appear. Enter the new display name and press [OK].

To change your [Time Zone], just select your time zone from the drop down list next to the time zone entry.
To add a new contact email to this account, press the [Add] button in the [Contact] section. A [Add New Contact] dialog will appear. Enter a name and an email address in the text field provided and then press the [OK] button.

To remove a contact email, select the email that is to be removed from the email list and press the [Remove] button. Press [OK] to confirm the removal.
To update a contact email, select the email that is to be updated from the email list and press the [Properties] button. A [Update Contact Property] dialog will appear. After you have made the changes that you want, press the [OK] button.

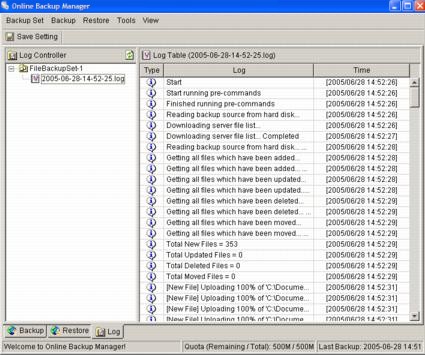
All backup activities are logged to backup activity log files. They are available for reviewing from
Rentavault.
How to review backup activities?
You can review all your backup jobs by
|
i.
|
Select the [Log] tab available at the
bottom of Rentavault
|
|
ii.
|
Select the Backup Job you want to review on the [Log Controller] panel  |

